Updated: November 16, 2014
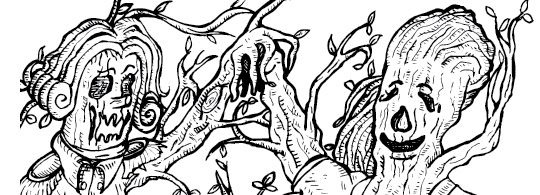
I just sketched some awesomeness. And I need my awesomeness to get digital, because I want to do bad stuff to it in Photoshop. What to do, what to do, in order to keep things just as good looking as I already see them in my head?
Well, this is the kind of process that happens in our designer/artsy head when we want to go digital. The purpose of this mini tutorial is to give some tips in order to improve the quality and versatility of your line art.
The first step is to get a picture of your drawing. And by picture I hope you know I mean scan it. Don’t you dare take a digital picture of it, as it will suck so badly in 98 percent of the cases!
I don’t need a fancy scanner for line art, almost any scanner is good enough. But, in order to achieve a good scan it is important to clean up your drawing really well, to keep things as clear as possible, so don’t be afraid of the eraser.
So, basic scanning, use the Windows scanner interface, as it is good enough in most cases. Select the custom tab, and do it in grayscale. You need to select a high dpi, I would say 600 or 300, depending on the size of the drawing – the smaller the drawing, the larger the dpi! This will come in handy when you need to get everything in clean black and white, later on. Also, now it’s a good time to make some initial tweaks for the contrast and luminosity of the scan. I move the contrast slider a bit on the plus side, but this is something you will need to experiment and find the best solution for yourself. Remember, there are no two scans alike, most likely you will get the best result in the second or third try, when you can see how the tweaks affect the quality of the result.
Line art tutorial

Now you have an image, time to go pro! Get in PS and start working. I first crop my image to save some resources and in order to focus better on what I am working.
Now, you see that the image is far from perfectly clean, so we need to change that. I use the levels tab (CTRL+L) to adjust the level of the black/white/gray sliders. What we want is a pure black and a pure white, without losing line quality. Discretion is advised. Play with it, there’s no way you won’t find a good solution. If you notice the line is getting grainy, leave it like this.
Now, go to the Adjust Brightness and Contrast menu, and enhance the contrast/lightness.
At this point, you should have a fairly nice black and white image. It still needs some cleaning, so grab your brushes! On a new layer, use a white colored brush to remove the unwanted grain/dust/other things that need not be in the final image.
Finally, now we need to separate the black from the white. In other words, to get the black line art on a different and transparent layer. Now, doing this is a whole new tutorial in itself, as there are quite a few methods of doing this! That is why I will show you a method that is fast and effective, most of the times.
For that you will need AI. Open a new image, and copy/paste the image from PS to illustrator. Now, we are going to live trace it, so, press the live trace button. Then, tweak the settings a bit, until you are satisfied with the result.
Click the expand button and now you have a vectorized image of your drawing. In order to separate the black from the rest of the image, we select all the white, using the Selection tool and then press the delete button.
That’s that, now all you have to do is use the line art as it is, if you are working in AI, or to copy/paste it back in PS. The huge advantage is that now you can scale your line art at any dimension, and this lets you use in a whole lots of new ways.
I was asked what method I used for coloring my line art as a gradient in this design. Well, basically, all the steps I described so far, plus a touch of PS magic.
As you know, layers in PS are versatile stuff, you can do all sorts of cool stuff using the layer options.
So, we have this setup, with the line art on its own separate layer, all blacks.
In this case, you need to lock your layer’s transparency (first square icon next to the Lock: text), which basically means that you are not able to work in the transparent areas, and that leaves the colored area as a working place. In our case, the black line art is the only thing that can be modified.
Now, select your gradient of choice, or your favorite brushes and get to work. As you see, applying a gradient on the locked transparency layer will result in the line-art getting all the colors. Neat, huh?
Well, that’s all there is for today. As always, experiment, find new ways, show us!
Leave a Comment