Step 1- Create the body
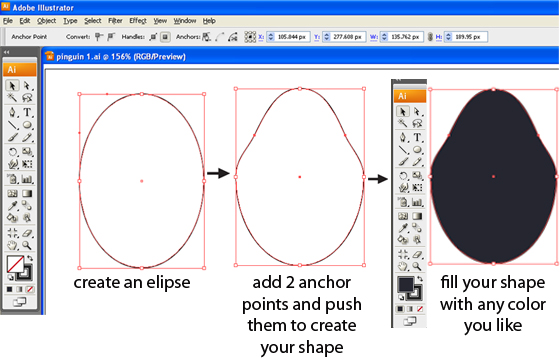
Create an ellipse using the Ellipse tool,or holding down the (L) key, then add two anchor points on the upper side of the ellipse. To add anchor points to a shape, go to Pen tool – Add anchor point tool, or hold down the (+) key. Then, push the anchor points created downwards to achieve your shape. After that, fill the shape with any color that you like. I chose a very dark blue color, in order to make the penguin look as natural as possible.
Step 2 – Create the wings
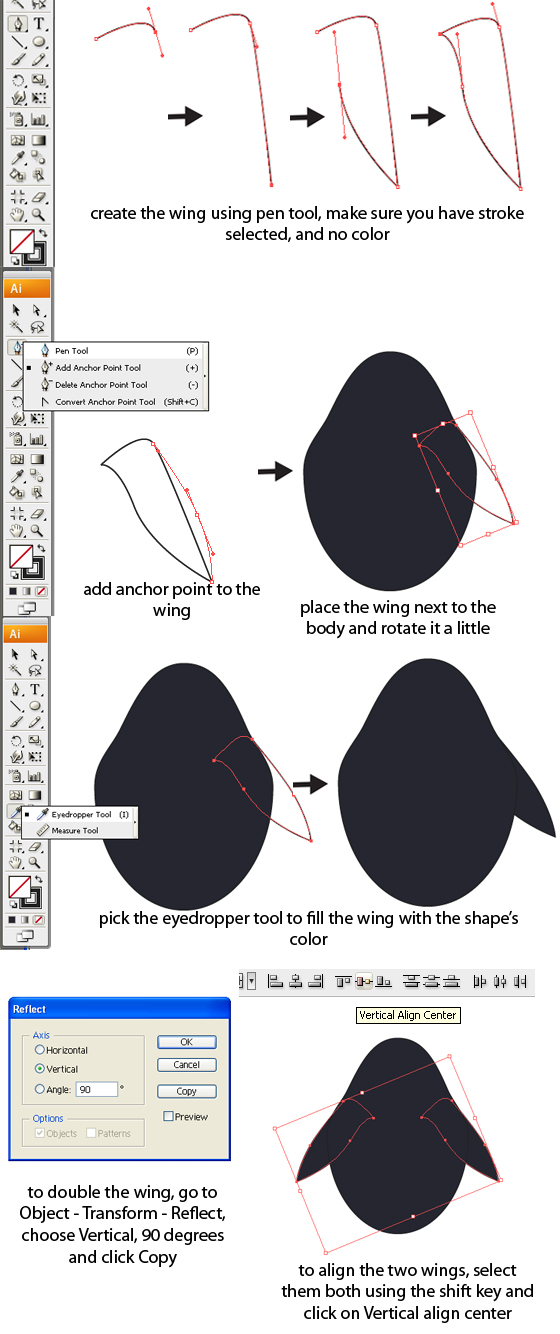
I made the penguin’s wings using the pen tool. Make sure you have selected the stroke and you have no color, so that you can see better what you are doing. Add an anchor point to the wing, so that you can play around until you achieve the shape that you like. Rotate the wing a little bit and put it next to the body. Now, select the wing using the black arrow (The selection tool) and then select the Eyedropper tool and click on the big shape. Your wing will achieve the color of the shape. To double the wing go to Object – Transform – Reflect, choose Vertical, 90 degrees and click Copy. You will get a mirror effect of the wing. To align the wings, select them both and go to Window – Align and select Vertical align center.
Step 3 – The belly and the eyes
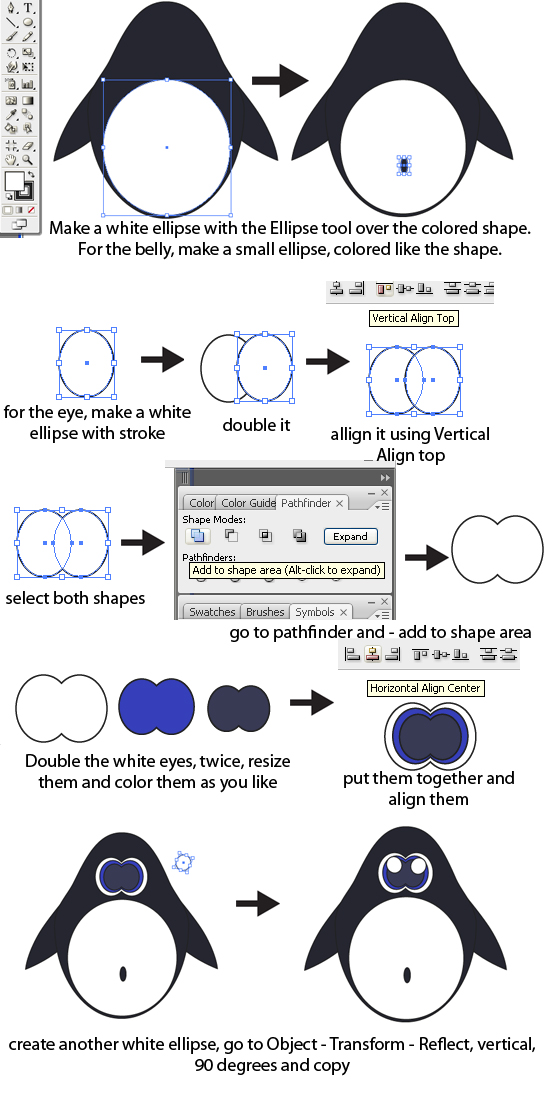
For the belly, just make a white ellipse with the Ellipse tool over the colored shape. For the bellybutton, do the same, but make it oval, very little and fill it with the body’s color. Do that with the eyedropper tool.
For the eyes, start by doing a white ellipse with stroke. Double it, by holding the Alt key down and just drag it near. Select them both and align them using Vertical align top from the top menu. Then, select again both shapes, go to Pathfinder, and select the first option there, Add to shape area. You’ll notice that the two ellipses become a single shape.
Step 4 – The nose
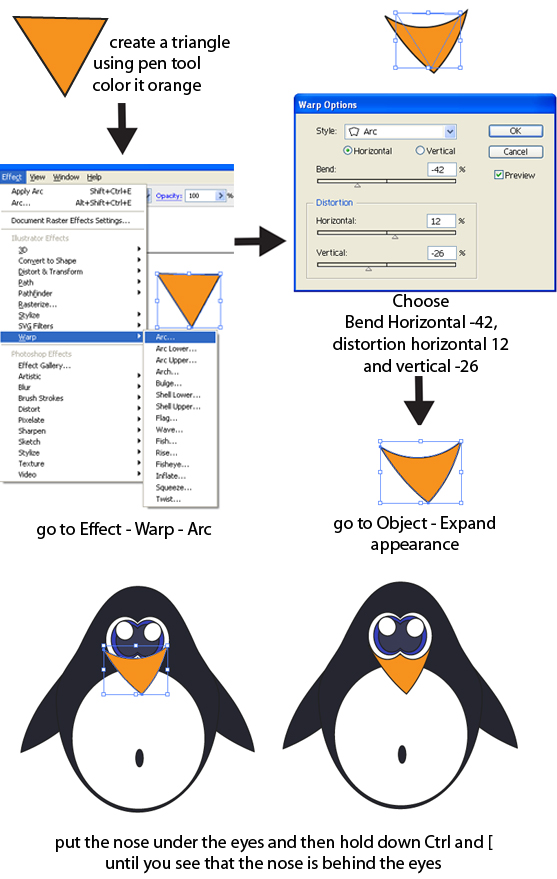
The nose is pretty simple, i used again the pen tool to create it. Make a triangle and color it orange. Go to Effect – Warp – Arc. Make sure that the preview is selected. Choose Bend Horizontal -42, distortion horizontal 12 and vertical -26. Click ok. After that, go to Object – Expand appearance and put the nose under the eyes. Now, to make the nose go behind the eyes you can go to Object – Arrange – Send Backward as many times until you see it behind, or just hold down Ctrl and [, it’s the same thing, but easier.
Step 5 – The feet
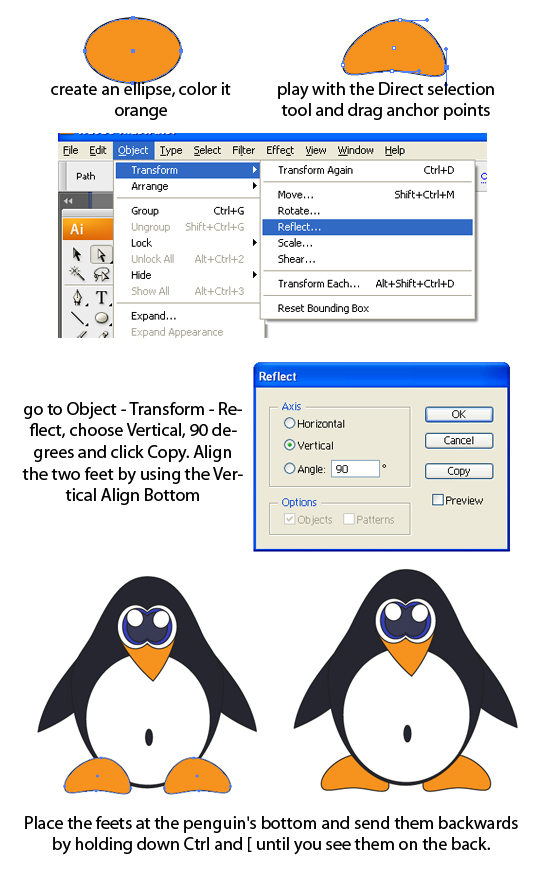
For the feet, make again an ellipse, color it orange as well, and then play around using the white arrow and dragging the existing anchor points (double click to select an anchor point). Then go to Object – Transform – Reflect, choose Vertical, 90 degrees and click Copy. Align the two feet by using the Vertical Align Bottom. Place the feets at the penguin’s bottom and send them backwards by holding down Ctrl and [ until you see them on the back.


That is a cool and simple penguin. Thanks for the tutorial…
Fantastic work. You have gained a new subscriber. I hope you can keep up the good work and I eagerly await more of these absorbing posts.
Thank you, I hope it was helpful. And fun, hehe
Yes, there will be more, I’m glad you liked it.
Heeey thanks a lot! im just getting used to Illustrator and this is grat.
Hope you can make a tutorial for the basico tools in AI!. Thanks!