


Surfing the internet, I’ve found some really cool vector tutorial about how to convert a simple image file as a bitmap into a vector. First of all, let’s make it all clear: a vector is an image that doesn’t lose its quality when enlarging. This is exactly why graphic designers prefer them, because they can print their images on bigger things. Well, bitmaps, on the other hand, don’t have this ability to look good when enlarged, so it is necessary to transform them into vectors if you want the job done. But, how do you do this? Let’s say you have a special drawing that you love dearly, or just an image found on the internet that you are found of. What do you do? Well, the answer is quite simple. You use Corel Draw and convert it into a vector, so you can as easily print it on huge boards or t-shirts, without loosing quality.
First thing you got to do is import your image into Corel Draw. If your image is colored, be sure that you transform it into black and white, because it is easier to work with a b/w image. Once converted in colors, you can see that the edges are not that smooth as you’d like them to be. To make that bitmap/vector conversion, use the PowerTrace tool from Corel Draw.
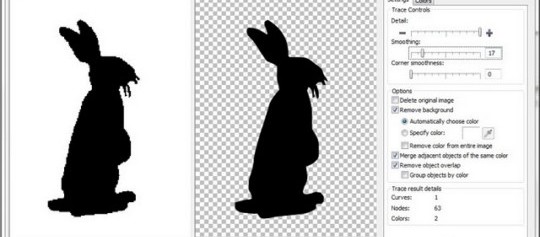
Next step is going to the Menu Bar, select Mode, then Black and White. Once the image is black and white you can convert it into a vector. Bitmaps > Outline Trace > Line Art. The PowerTRACE window will launch. The before and after images will appear. On the left is your bitmap and on the right the result of the conversion. Wait for it a bit to convert. Then select the Shape Tool, or just pres F10, and, as the French use to say: Voila! You got yourself a nice vector, instead of a boring bitmap image.
Leave a Comment