For those who use a drawing tablet and are gifted with amazing drawing talent, these tips are just helping them to improve and perfect their design. I just hope this will be helpful for the ones who are in the process of learning this amazing program called Adobe Illustrator.
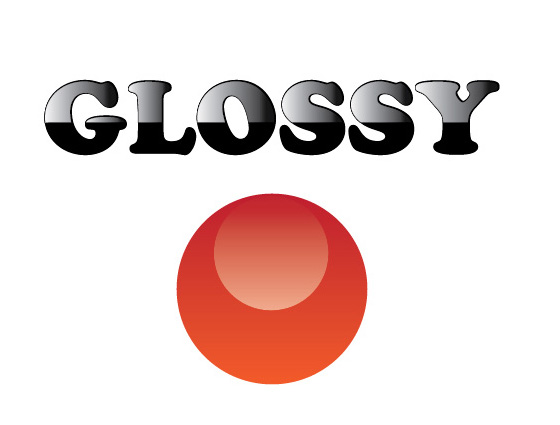
The preview image
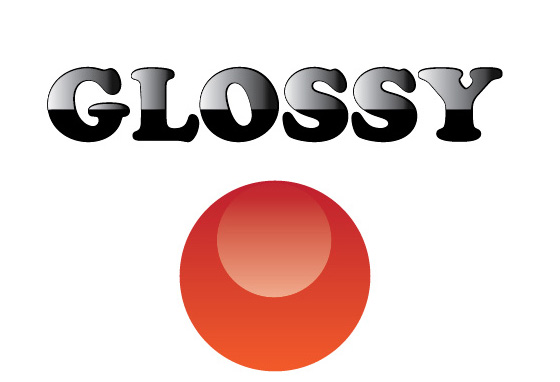
This is what we will achieve after finishing this tutorial. We will apply the opacity mask not only to a shiny little ball, but also to text. Let’s get started!
Step 1 – Create the shapes
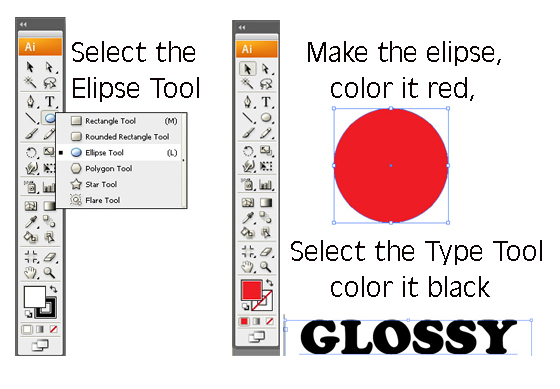
Create a new document 500 pixels wide by 500 pixels tall. Make sure you have selected the RGB or the CMYK mode in the advanced options. I will explain the difference between these two in a different post. Now…with the Ellipse Tool, create an ellipse that is 150 px by 150 px. Or, you can hold down the shift key and just drag a perfect circle as big as you like. Fill the ellipse with a red color and take off the stroke.
Next, we’ll do the same with a text. Select the Type Tool (T) and write something. I’ve chosen a bolder font, and also 80 pt for the size, so it would be visible what we are doing.
Step 2 – Expand the text
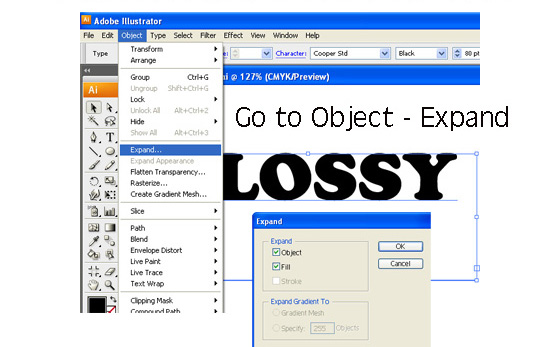
Ok..now we have the text, but in Illustrator is much easier to work with the text if the program sees it as an object, and not as a simple text. We’ll select the text box using the black arrow (Selection Tool), and then go to Object – Expand and click OK. Now, our text is considered an object by Illustrator, and that’s a good thing, because
it will be the best way for us to apply the glossy look.
Step 3 – Applying opacity mask to the ball
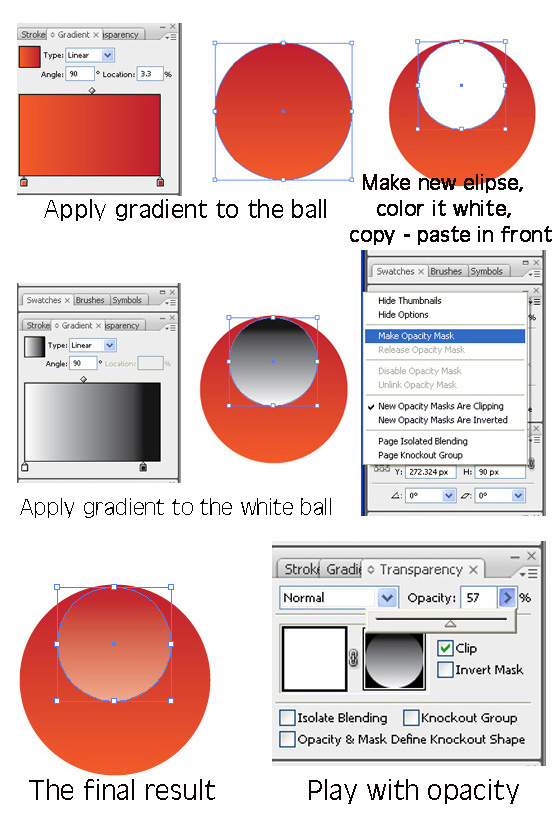
We’ll start applying the opacity mask to the ball first of all, but before that, let’s change its color from red to a gradient red. I used a gradient from red to warm orange, the type of the gradient linear and the angle 90.
Now… with the Ellipse Tool, create another ellipse that is 90 px by 90 px. Make its color white and drag it over the other ellipse that we’ve created before. With the white ellipse selected, go to Edit – Copy, and then again Edit, Paste in Front. Now we have tho ellipses in there, although we see only one. We’ll deselect them by clicking outside the circles, and then select only the
last white ellipse we’ve made. Make it gradient, from white to black, angle 90, linear. Still remember that underneath that gradient ellipse there is a white one, with the same dimensions. Now select both of them, and go to Transparency (if you don’t see it, click on Window – Transparency), and then click on Make Opacity Mask. If you don’t like the way it is, you can also play around with it’s opacity. I’ve turned mine to 57.
Step 4 – Applying opacity mask to the text.
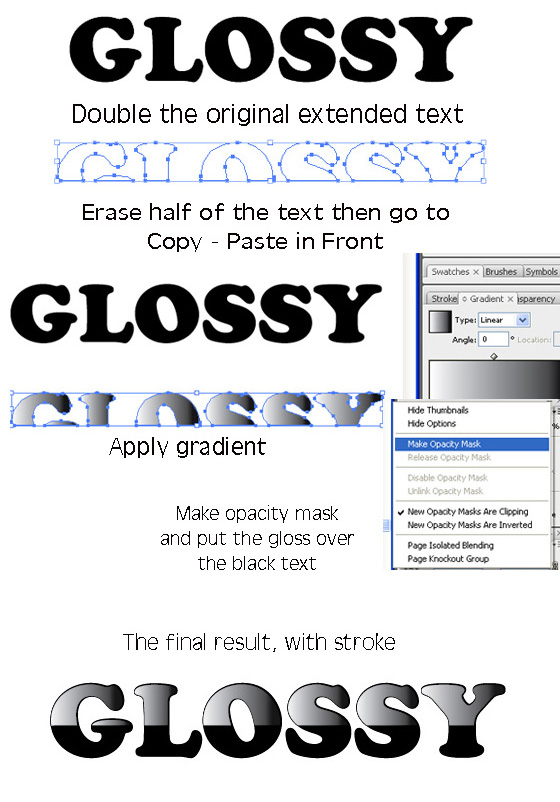
We’ve created the ball, now let’s move on to the text. Remember we expanded the text earlier, so what we will have to do now is to double the text. The process is the same as that applied to the ball. Select the expanded text with the Selection Tool and hold Alt and drag the text down. You will have it twice. Now make its color white, and select the eraser tool, and erase half of the text. Select it with the selection tool, then go to Edit – Copy, Edit – Paste in front. Deselect the text by clicking outside, and the select the text and make it gradient, as we did with the bubble. Now select both texts, the ones that are half erased, and go to Transparency – Make opacity mask. You will notice that the text will turn to white, but that;s not white, it’s just glow, :). Now select the two text, half erased, and put them above our black text. You will have the final result, and the same, you can play around, making the opacity lower, or applying stroke, as I did.
Step 5 – The final look
The final image: the text and the bubble, with a glossy effect created using the opacity mask.

Leave a Comment